

The latest version of Google's Android platform, Jelly Bean 4.1, has been out for a number of months. If you own a Samsung Galaxy S III, however, you'll need to wait a while yet before you receive a software update notification allowing you to get some Jelly Bean goodness.
For people who have purchased their Galaxy S III through Australian telcos like Telstra, Optus and Vodafone, the official Jelly Bean update isn't likely to officially be available for a few weeks or longer. It should be available before the end of the year, but it will depend on the version of phone you have and where you purchased it.
If you can't wait that long, however, you can install the Jelly Bean software to your Galaxy S III manually, provided you are using a Windows PC. We've written an easy, step-by-step guide that includes images to help you through the process. The installation should take you less than 10 minutes to complete.
IMPORTANT: Before you go ahead you should ensure you backup your Galaxy S III and save any important data (such as photos and videos) you want to keep. This manual software installation will NOT wipe any data on your handset but it's better to be safe than sorry.
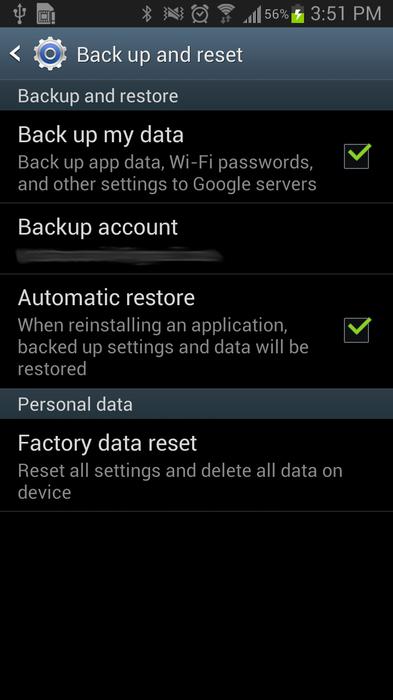
To back up your Galaxy S III, navigate to Settings > Backup & reset and ensure the "Back up my data" checkbox is ticked, as shown in the image below:
To back up other files that won't be saved through your Google account there are a few options. For photos, we recommend the excellent Dropbox app. Navigate to the camera upload menu and you can choose to sync the images in your camera roll that you want to keep.
The best way to manage this in an ongoing manner is to use the automatic camera upload feature in the settings menu of Dropbox. When this is switched on, any new photos you take with the Galaxy S III's camera will automatically be uploaded to Dropbox.
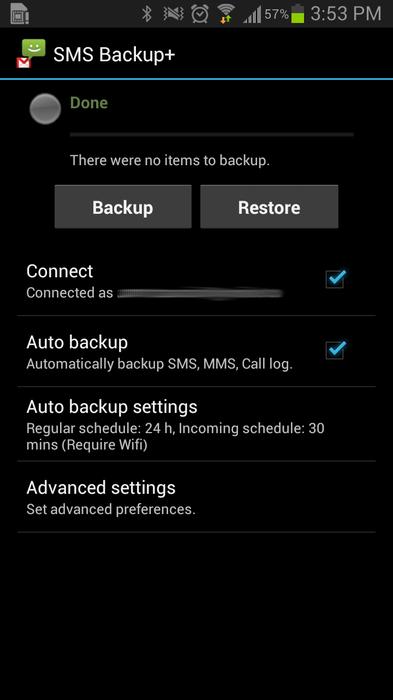
To backup your text messages, we recommend the SMS Backup+ app. It can back up your text messages through your Gmail account and can be set to backup automatically, or at predefined time periods.
WARNING: PC World Australia takes no responsibility for anything that might go wrong during this process. We are not liable for any faults or damages caused by any of the procedures in this guide. If followed correctly, these instructions should ensure a hassle free process but you are ultimately advised to attempt this at your own risk.
This guide will work with the GT-I9300 version of the Galaxy S III sold by Optus and the GT-I9300T version of the Galaxy S III sold by Telstra and Vodafone. Do note that it will remove any Australian telco customisation such as included Telstra/Optus/Vodafone apps. This method does not require the phone to be rooted.
How to install Jelly Bean on your Samsung Galaxy S III
Step one
If you don't already have it installed, download and install the Samsung Kies software for your PC from here.
This will install the necessary drivers for your Galaxy S III, so you can complete the firmware upgrade. Close the Kies application once you've installed it.
Step two
Download the official Samsung Galaxy S III Jelly Bean firmware from here. It should be an 780.5MB file.
Once the download is completed, extract the firmware file (ending in .tar.md5) to your PC. We recommend extracting the file to your main hard drive. In our case, this was the C:\ drive.
Next, extract the Odin3_v3.04.zip file to your PC.
Step three
Open the Odin.exe file on your computer. It should look like this:

Click on the 'PDA' box in Odin and open the firmware you downloaded and extracted to your PC in step two. It should look like this:

Step four
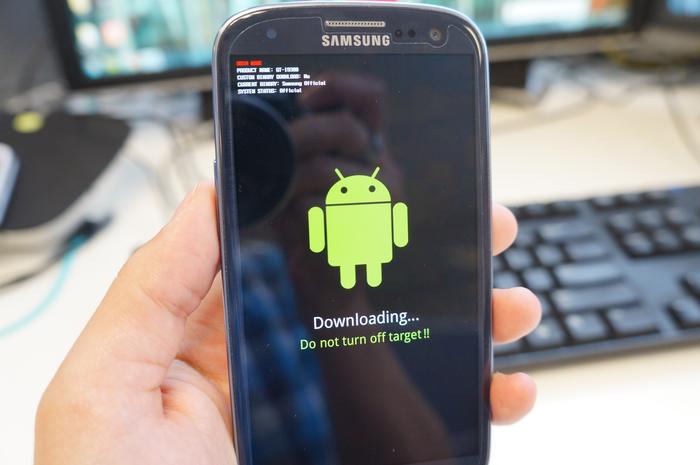
Turn off your Galaxy S III. Put the phone into bootloader/download mode by holding the power button together with both the home and volume down buttons. Hold these three buttons simultaneously until you see this screen:

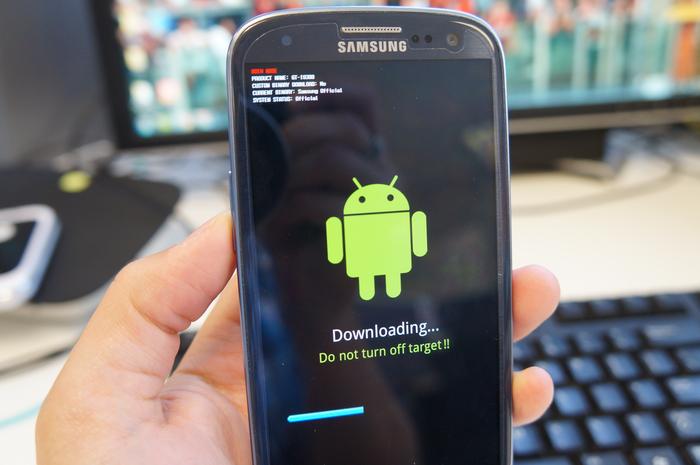
Press the volume up button to continue and you'll then see this screen:
Step five
Plug your Galaxy S III into your PC using the USB cable. The phone should automatically be detected by your computer and will be displayed in the ID:COM box on Odin as shown below. (On our PC the port is COM8, but it may be a different number on your computer).
Press Start on Odin. You should see a progress indicator on Odin and a progress indicator bar on your Galaxy S III, as shown below:
Ensure you DO NOT remove the USB cable from your Galaxy S III while the firmware is upgrading. Once the process is completed, your Galaxy S III should restart.
To confirm you're running Jelly Bean, go to the settings menu on your Galaxy S III, scroll down to "About" and you should see the Android version listed as 4.1 as shown in the image below:

Guide credits:
XDA Forums for the stock version of Android Jelly Bean 4.1 and Odin 3.04.
Samsung for the Kies software and drivers.