
Every organization, big or small, has a hidden asset: Old laptops and desktops that have outlived their usefulness, are too slow for today’s software or use less secure operating systems. Admittedly, that doesn’t sound like anything of great value. But it’s easy to breathe new life into those machines by converting them into Chromebooks.
Because the Chrome OS is lighter than Windows and macOS and requires fewer resources, older systems that bog down with Windows 10 or macOS Mojave often work just fine as Chromebooks. That means that systems with slower CPUs, less RAM and smaller hard drives — the ones that no one in your organization wants to use — can get a second lease on life.
I’m going to show you how to use Neverware’s CloudReady Enterprise Edition to turn an old Mac or Windows PC into a Chromebook; there are also versions of the software for schools and home use. I’ll be using the three-week trial software, which can be converted to the full licensed version, which includes support, for $49 a year. The software has its own dashboard but can also use the Google Admin Console to monitor, manage and update a company’s worth of Chromebooks; that adds $50 a year to the cost.
While I’ll be using a Toshiba Satellite Radius laptop, desktops work just fine. In fact, I recently converted a Lenovo all-in-one system that refused to take Windows 10 updates. You’ll need an 8GB USB flash drive to install the software, about 30 minutes and, of course, an old PC that you want to convert. In the steps described below, the assumption is that you are converting a Windows machine, but the process is similar for macOS conversions.
Step 1: Getting started
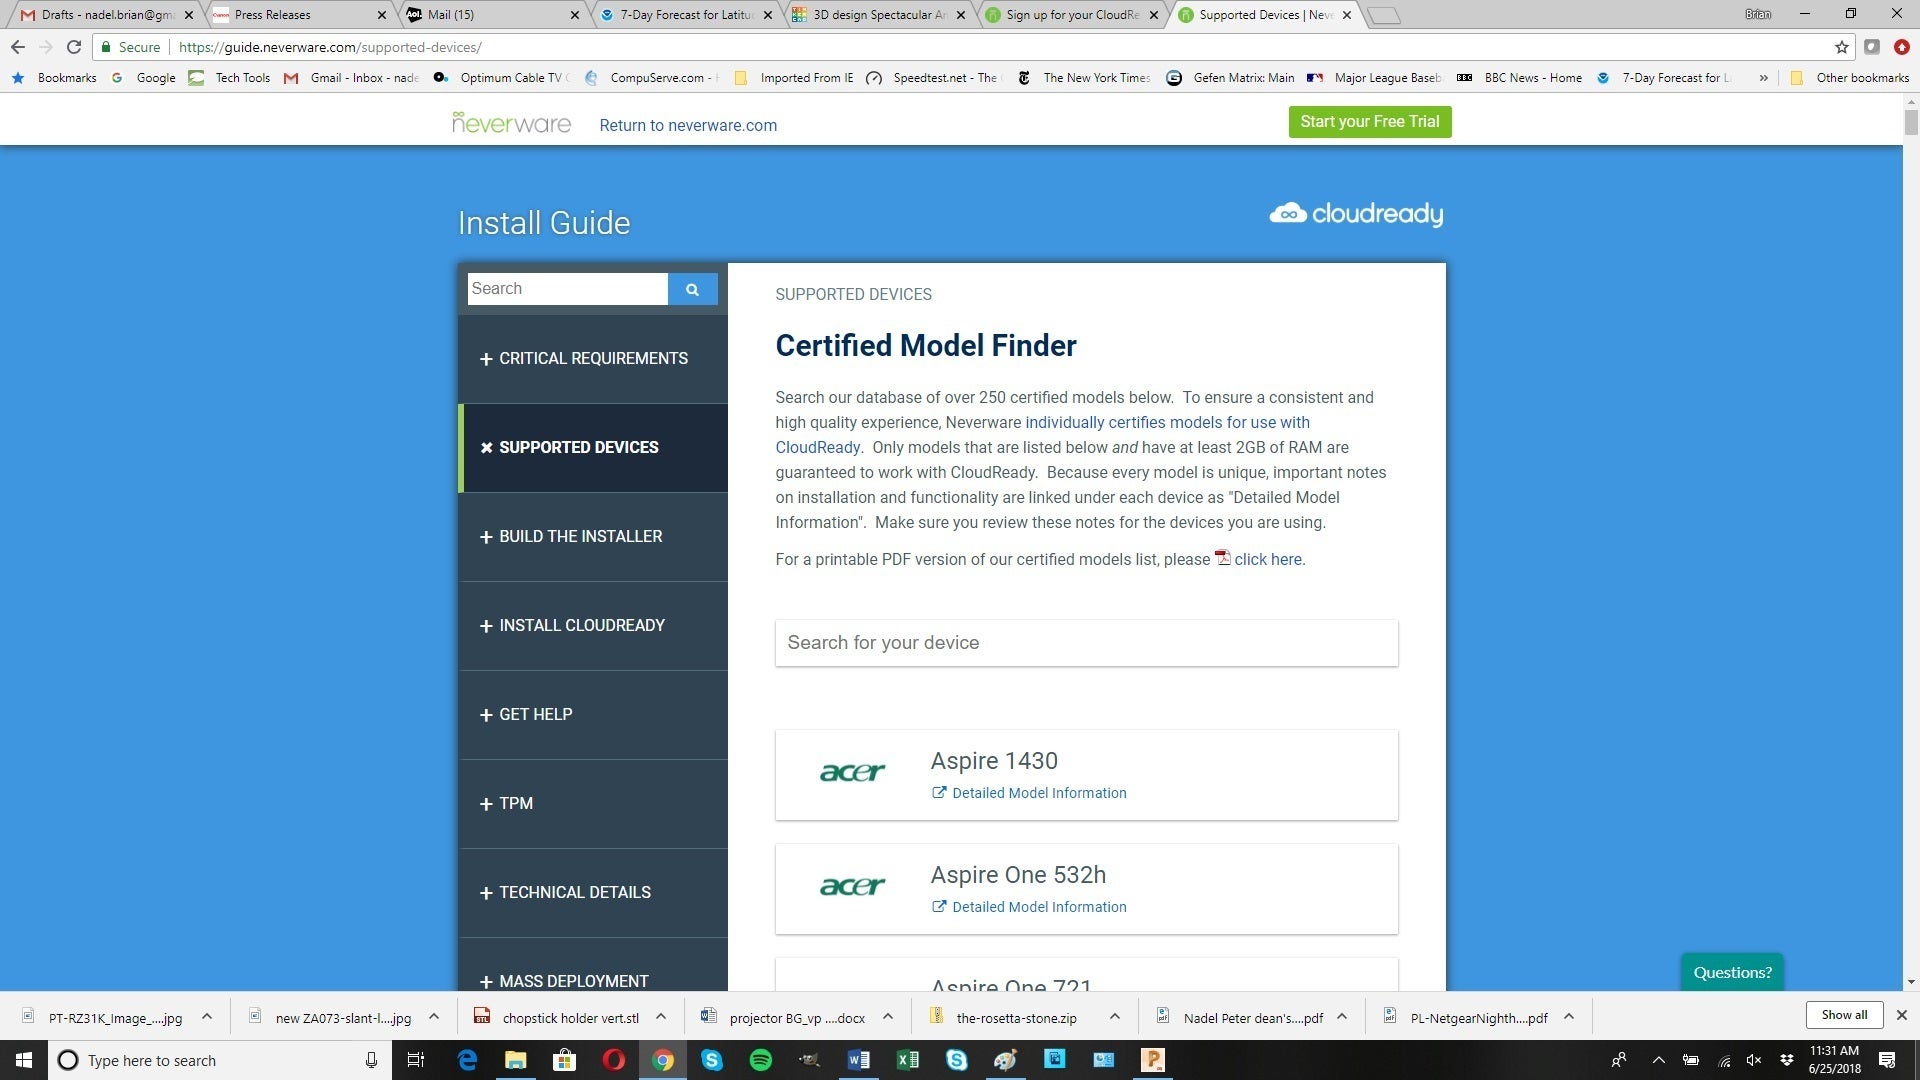
Start by seeing if your system is on CloudReady’s compatibility list at Neverware’s site. The list has hundreds of systems, but if your system isn’t on it, I suggest making the conversion flash drive and trying it out anyway. Chances are it will work.
 Brian Nadel/IDG
The start of a long list of machines that are compatible with CloudReady. (Click image to enlarge.)
One last preliminary: The software formats the system’s drive, essentially making previous data inaccessible. Still, you might want to shred its contents, just in case there’s something confidential on it.
Step 2: Getting the software
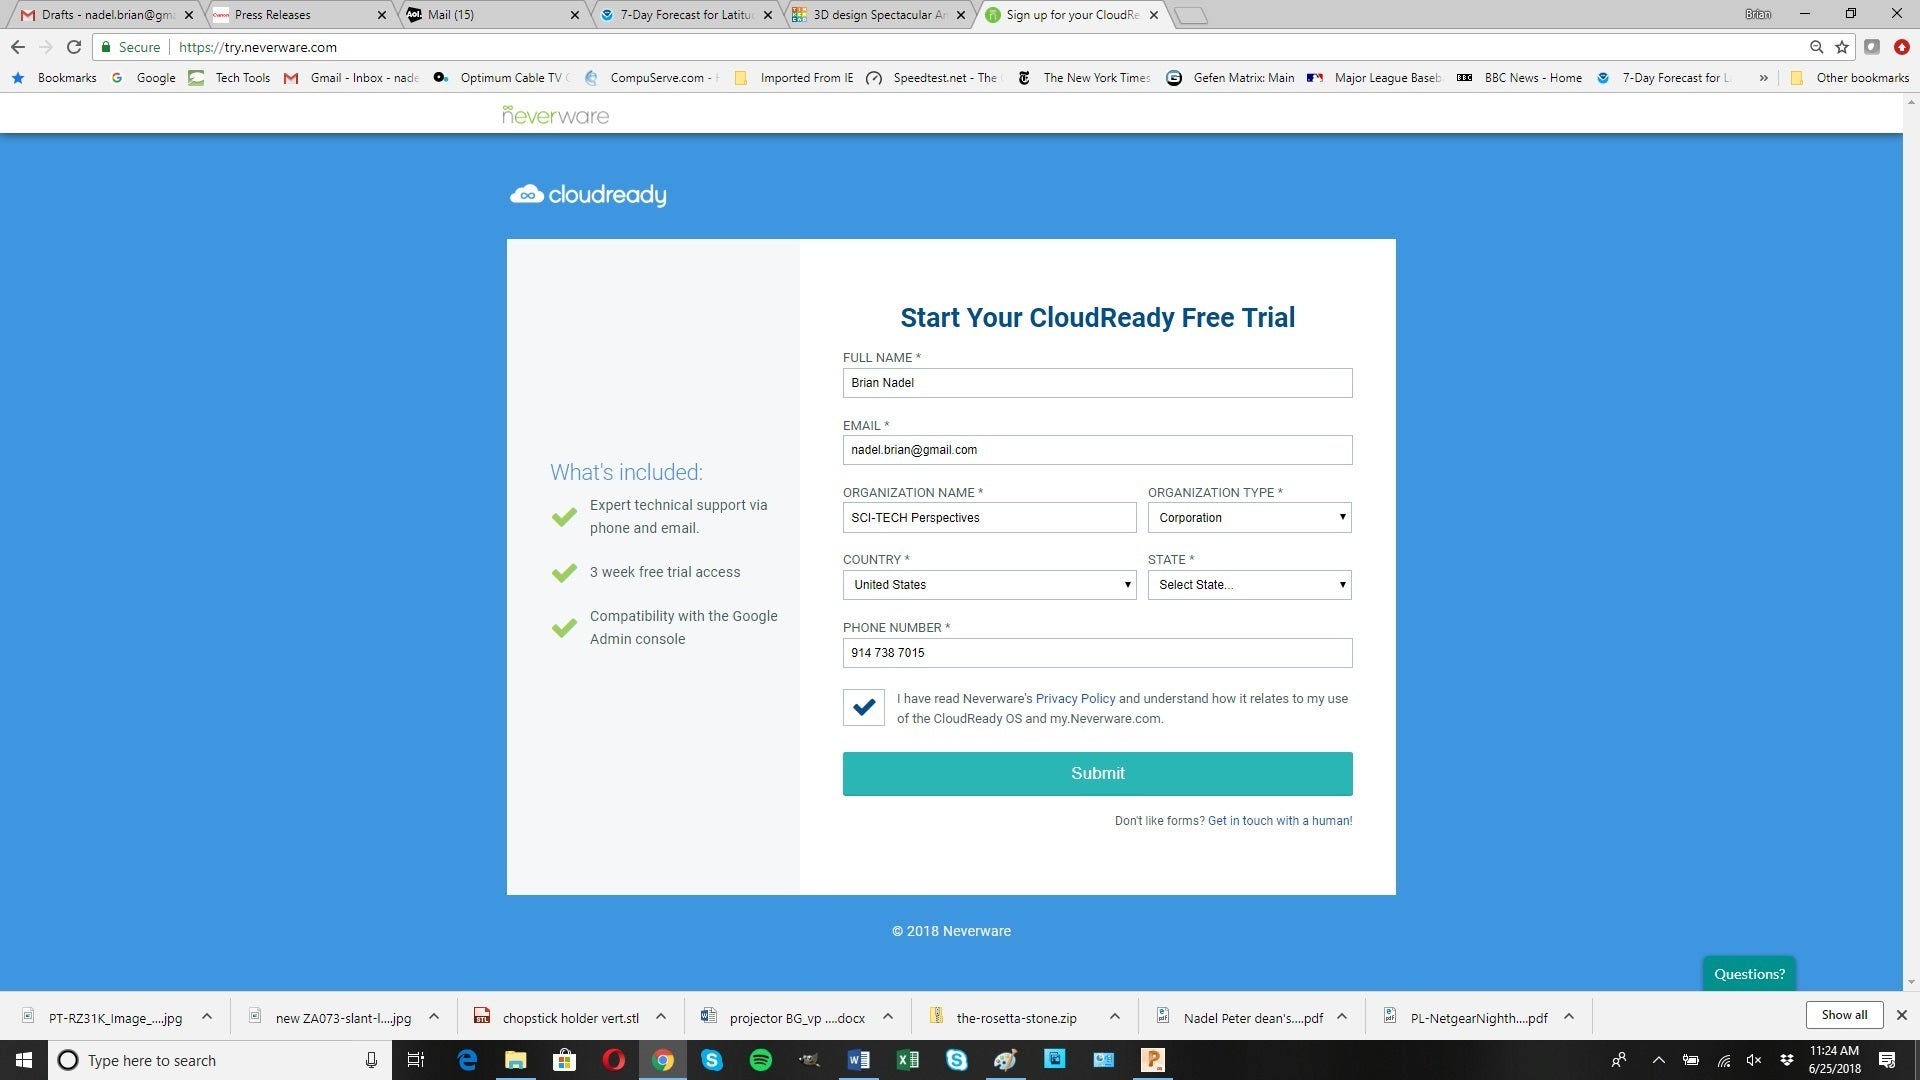
Using a Windows 7 or newer computer (it need not be the machine you are going to convert), go to Neverware’s download site and fill out the form, accept the company’s license terms and pick a password; you’ll need it later. I suggest reading the Install Guide to help make the process more efficient. (Note that this step can also be done with a computer running macOS. I couldn’t find any information about version on Neverware’s site, but there is a warning that you must use the free software called Unarchiver to unzip the CloudReady file that is created, due to a bug in macOS.)
 Brian Nadel/IDG
Filling out this form gets you the free trial. (Click image to enlarge.)
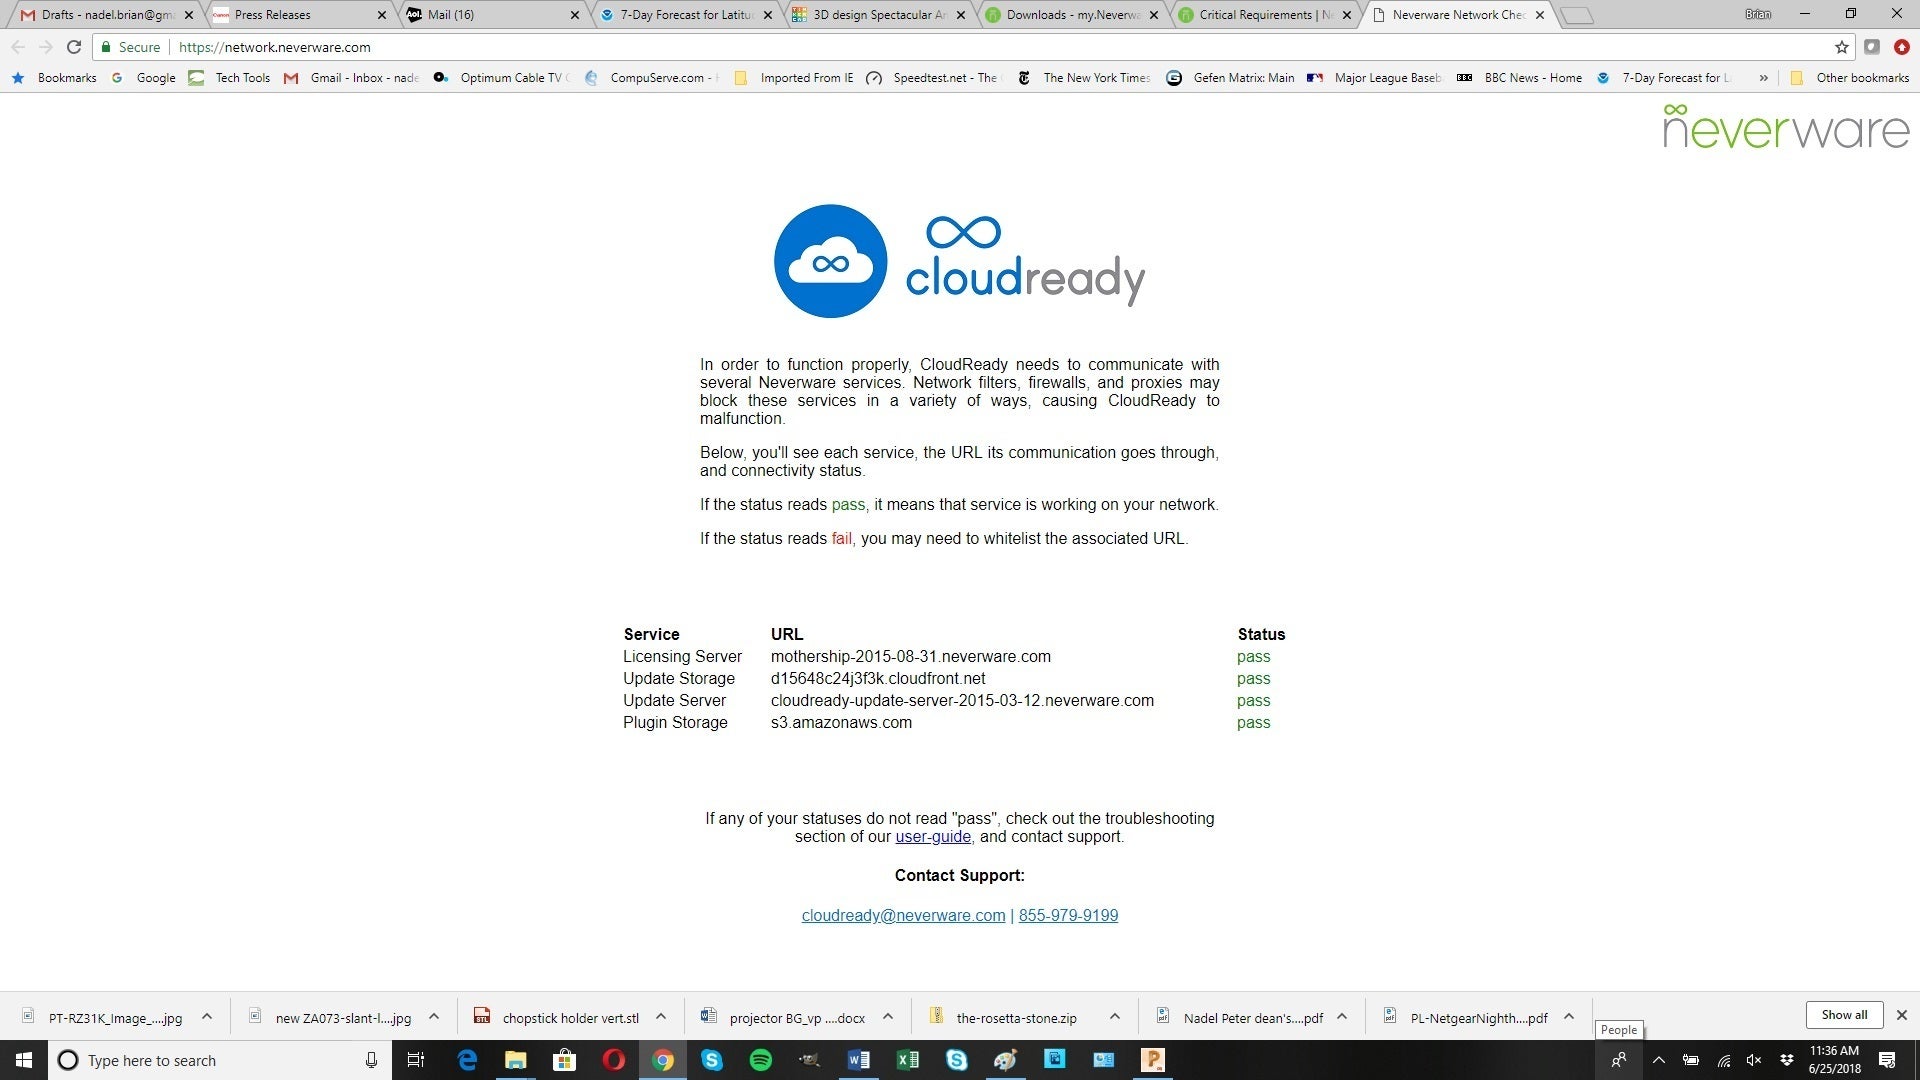
At this point, the installation sequence takes over. After running the “Check Network” routine, click “Next: Build the Installer” at the page’s bottom right.
 Brian Nadel/IDG
The results of the network check. (Click image to enlarge.)
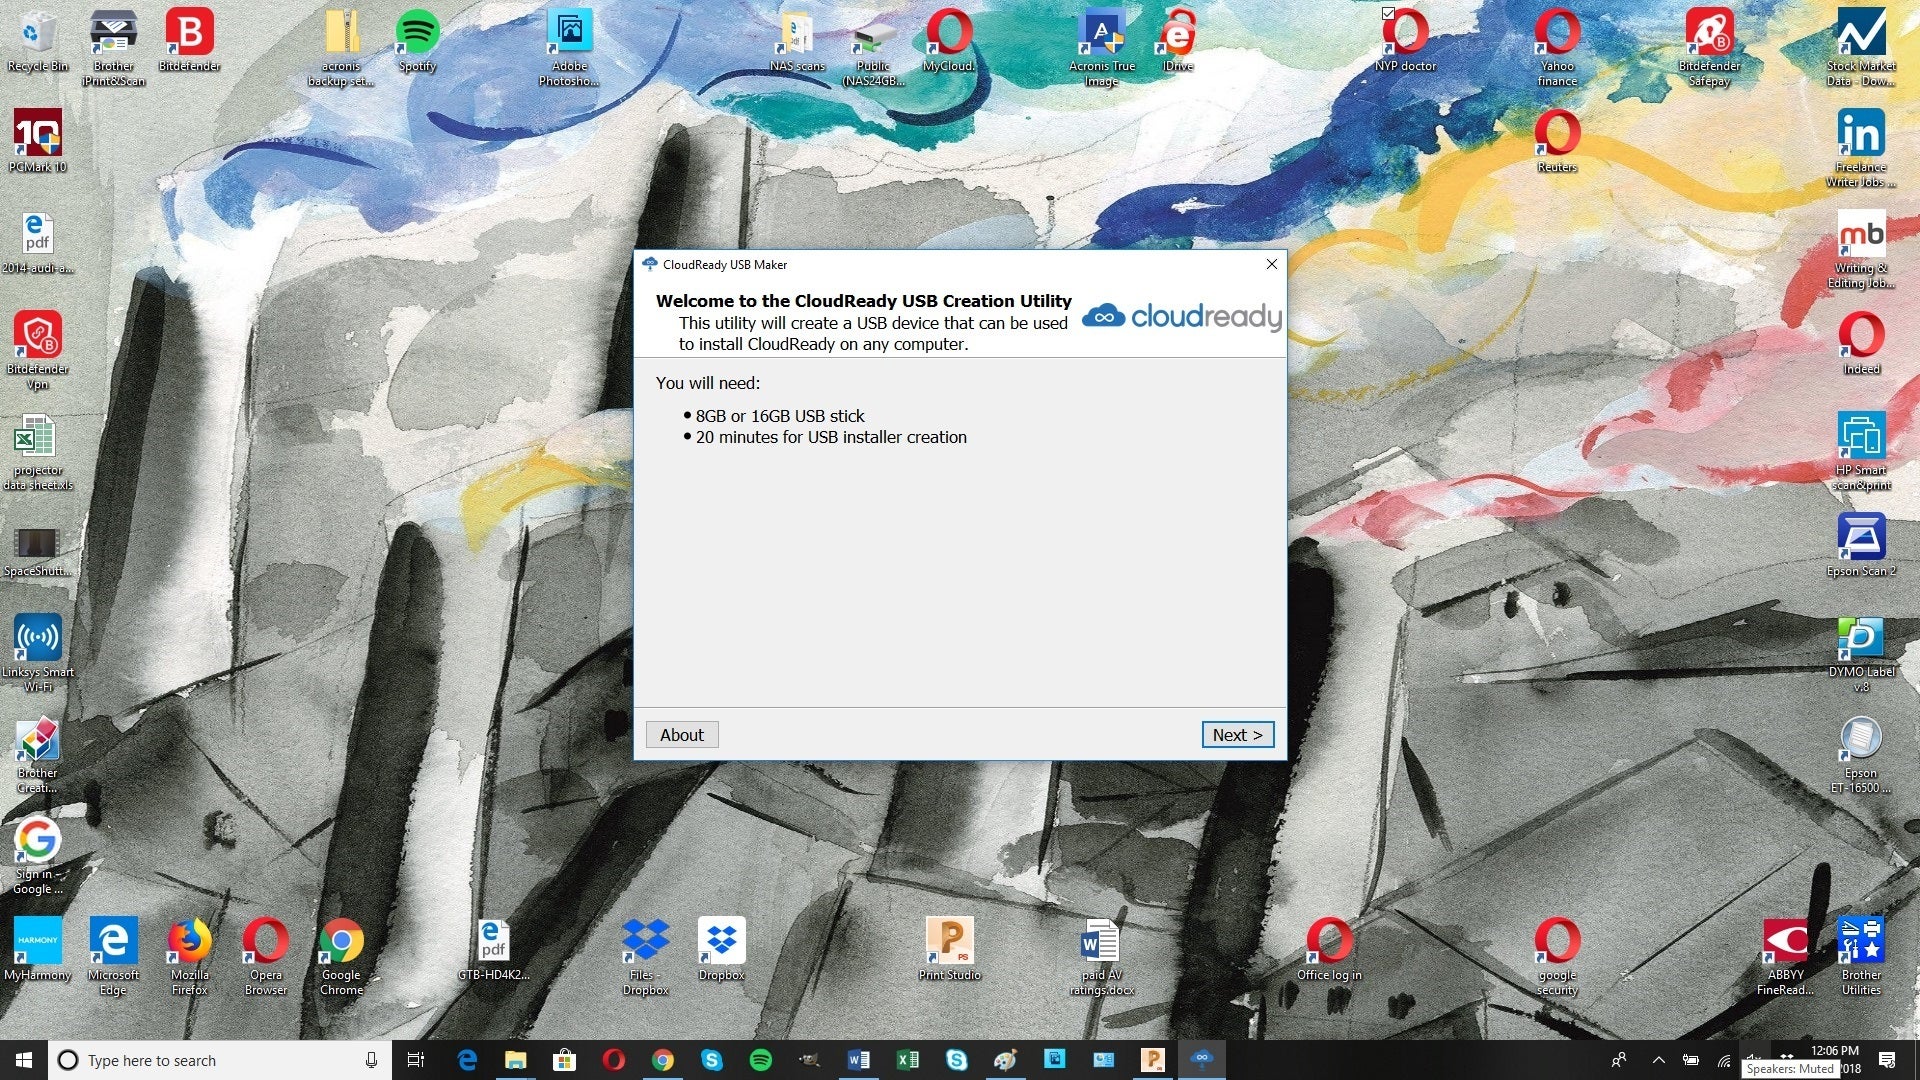
Step 3: Creating the installation flash drive
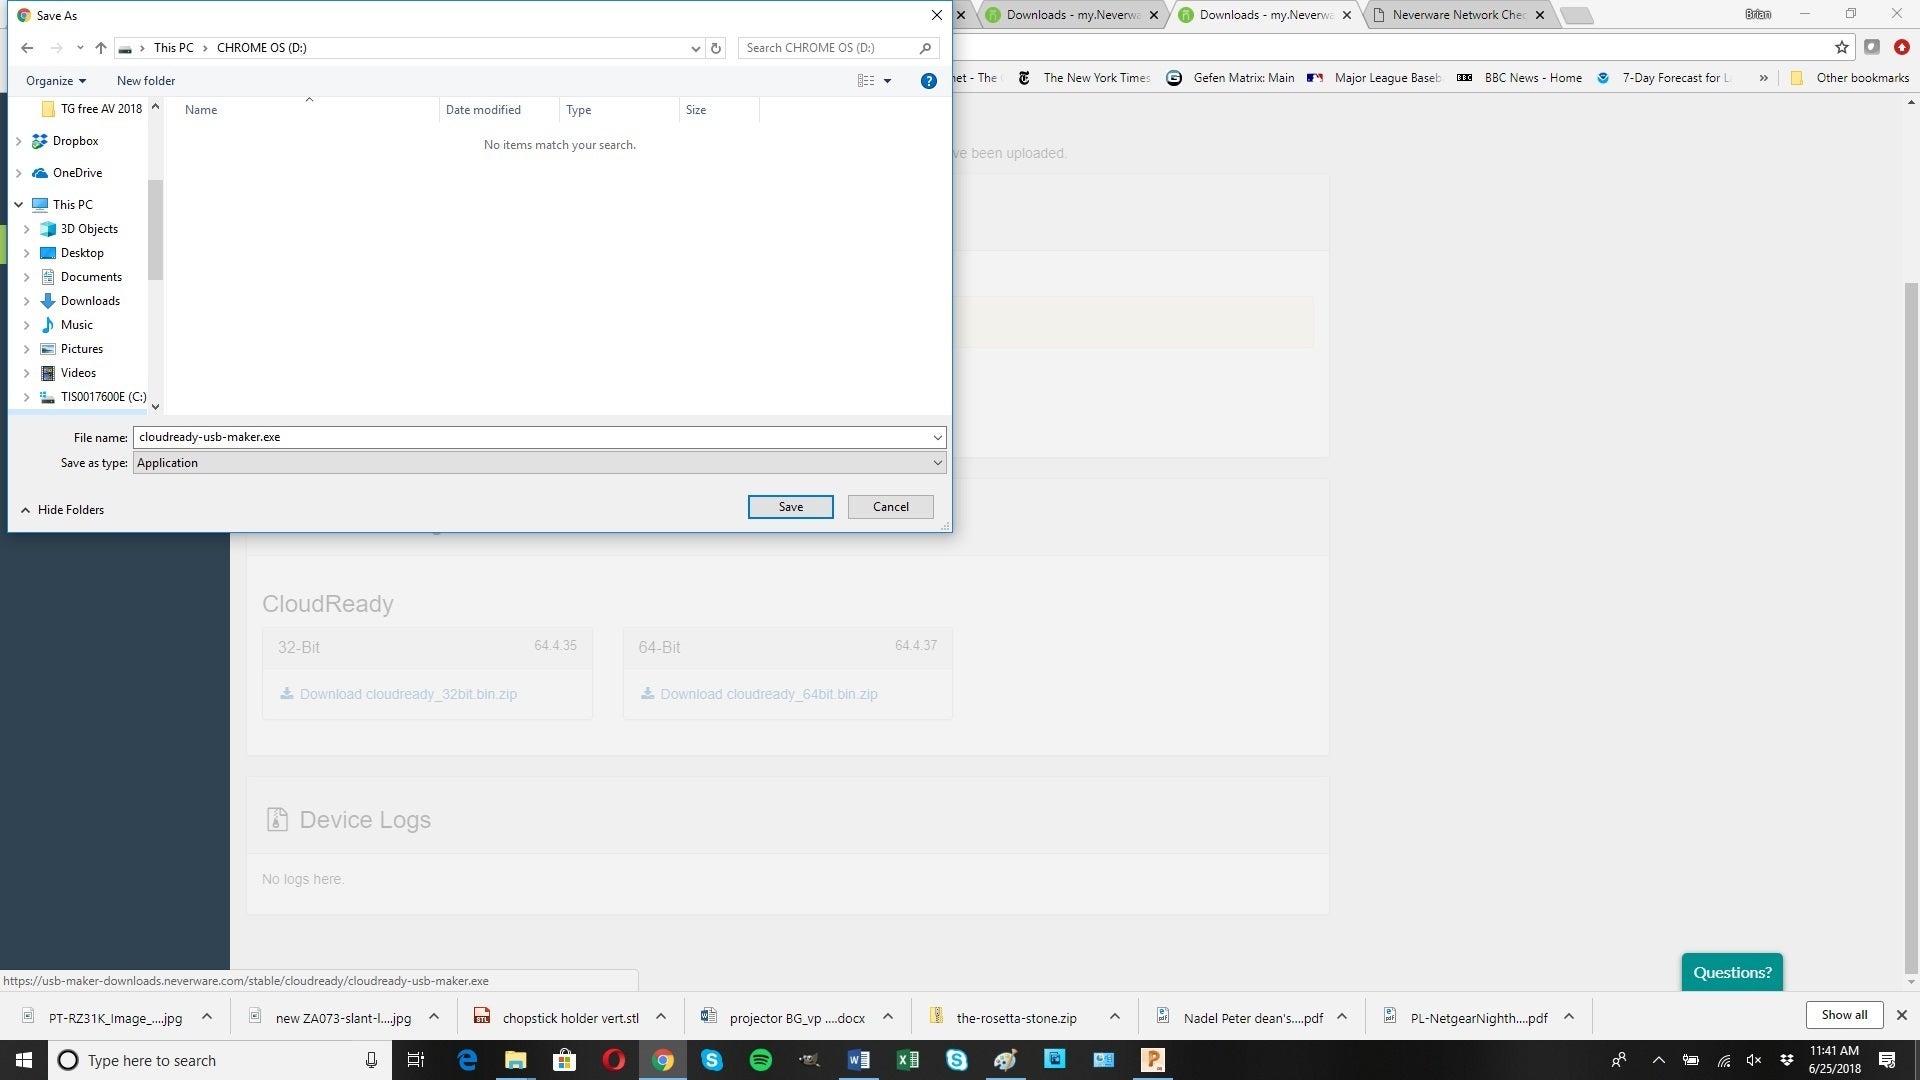
Click “Download USB Maker” to get the 42MB installation file that makes the installation flash drive. After clicking “Next” in the lower-right corner and entering your email address and password, pick the 32- or 64-bit version.
 Brian Nadel/IDG
Getting started with the USB installer. (Click image to enlarge.)
After clicking “Next,” insert the USB flash drive you want to use. Click “Next” to download the software from CloudReady’s servers. The software extracts the compressed image and loads the software on the flash drive. After about 15 minutes, it’s done; click “Finish.”
 Brian Nadel/IDG
The CloudReady USB creation utility. (Click image to enlarge.)
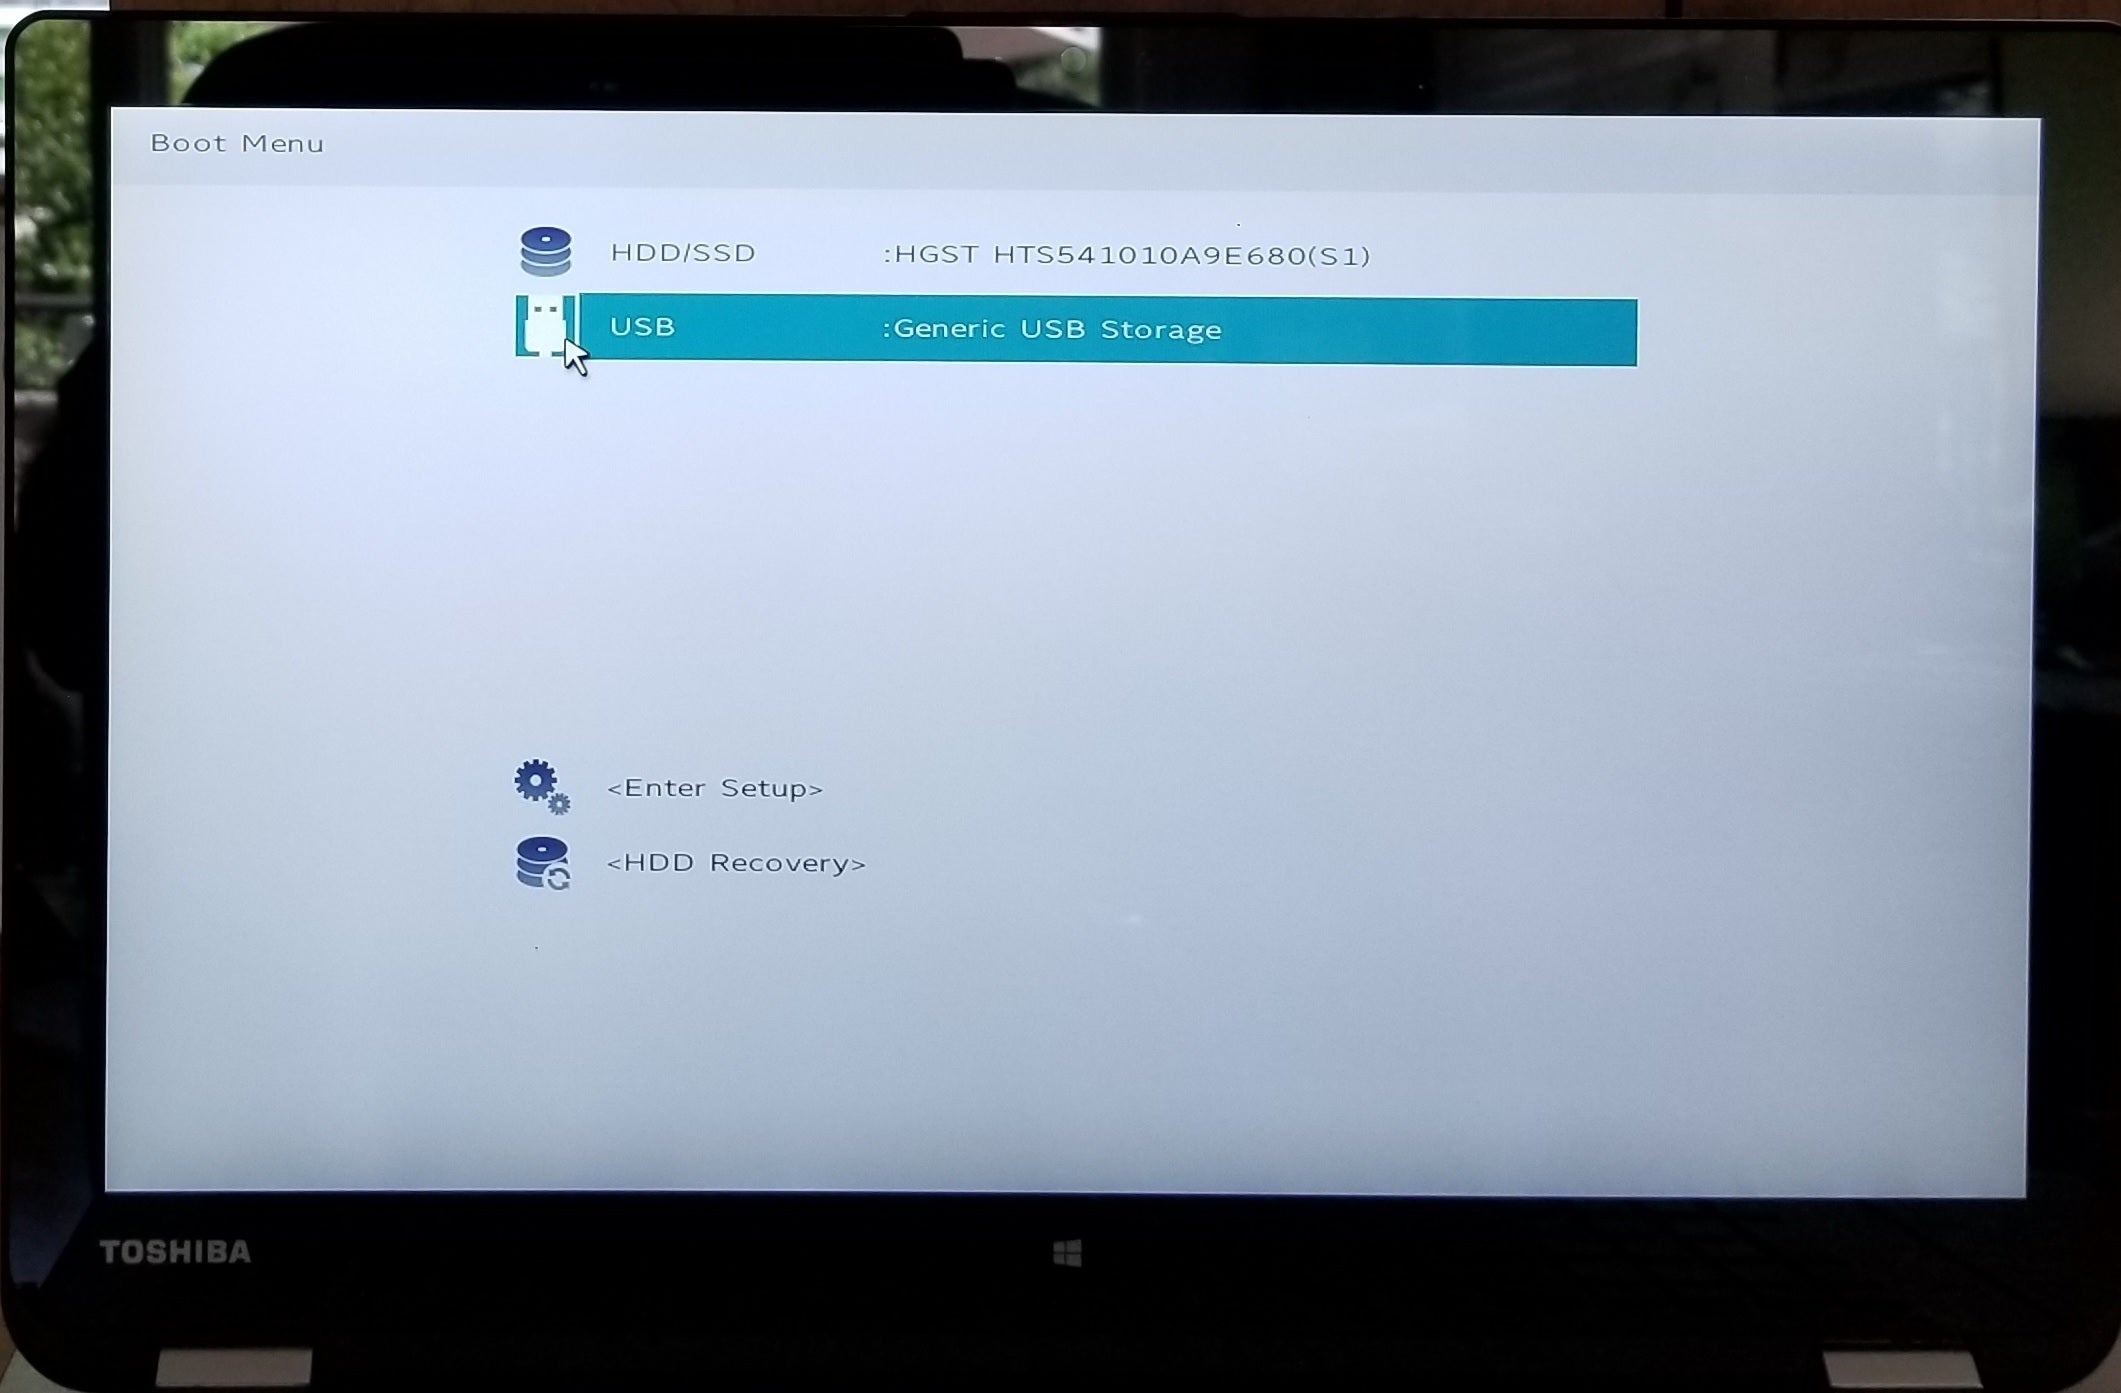
Step 4: Starting the conversion
Plug the flash drive into the machine you want to convert and turn on the PC. Before the OS starts loading, go to the system’s BIOS utility. For the Radius, I pressed the Function-12 key to bring up the Toshiba’s Startup Utility. Each machine is slightly different, with some using FN-1, FN-2, FN-9 or FN-10; Macs require pressing the Option and Command (cloverleaf) key.
Next, I changed the settings so that the system goes first to the USB port for its startup software. I also disabled the Secure Boot feature that prevents booting from an external drive. When everything is done, I suggest changing these settings back.
 Brian Nadel/IDG
Changing the boot settings.
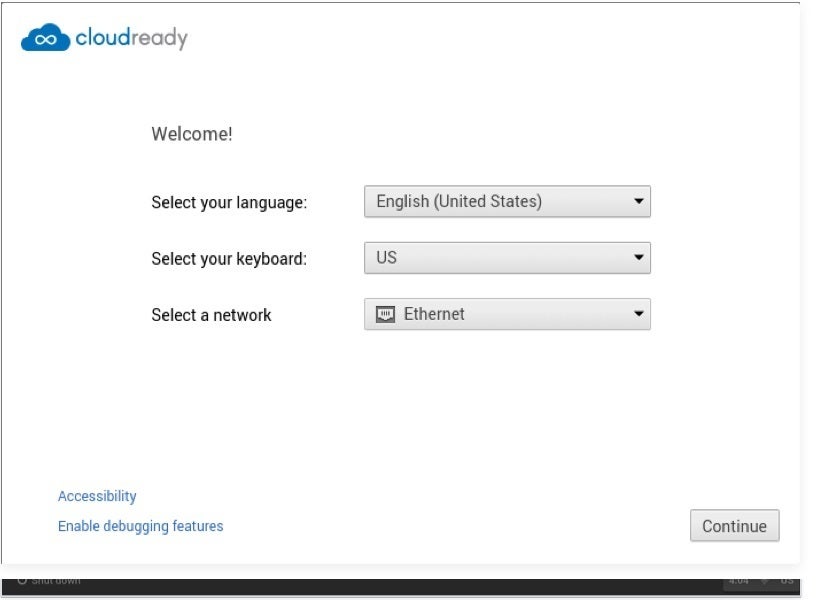
Step 5: Setting the system up
Start the machine up, and the CloudReady software loads from the flash drive. It asks what language you’d like to use and then your Wi-Fi network and password.
This is just a preliminary, followed by clicking “Install CloudReady.” The software then creates a new system. This takes about 10 minutes.
 Neverware
(Click image to enlarge.)
 Neverware
(Click image to enlarge.)
Step 6: Welcome to Chrome
When the machine shuts down, it’s complete. After taking the flash drive out of the machine, start it up. It again asks for your Wi-Fi network and password, followed by a software update.
Congratulations, the system is now a Chromebook and it asks you to log into a Google account. The screens look just like any other Chromebook except that the Chrome icon is blue instead of yellow, red and green.
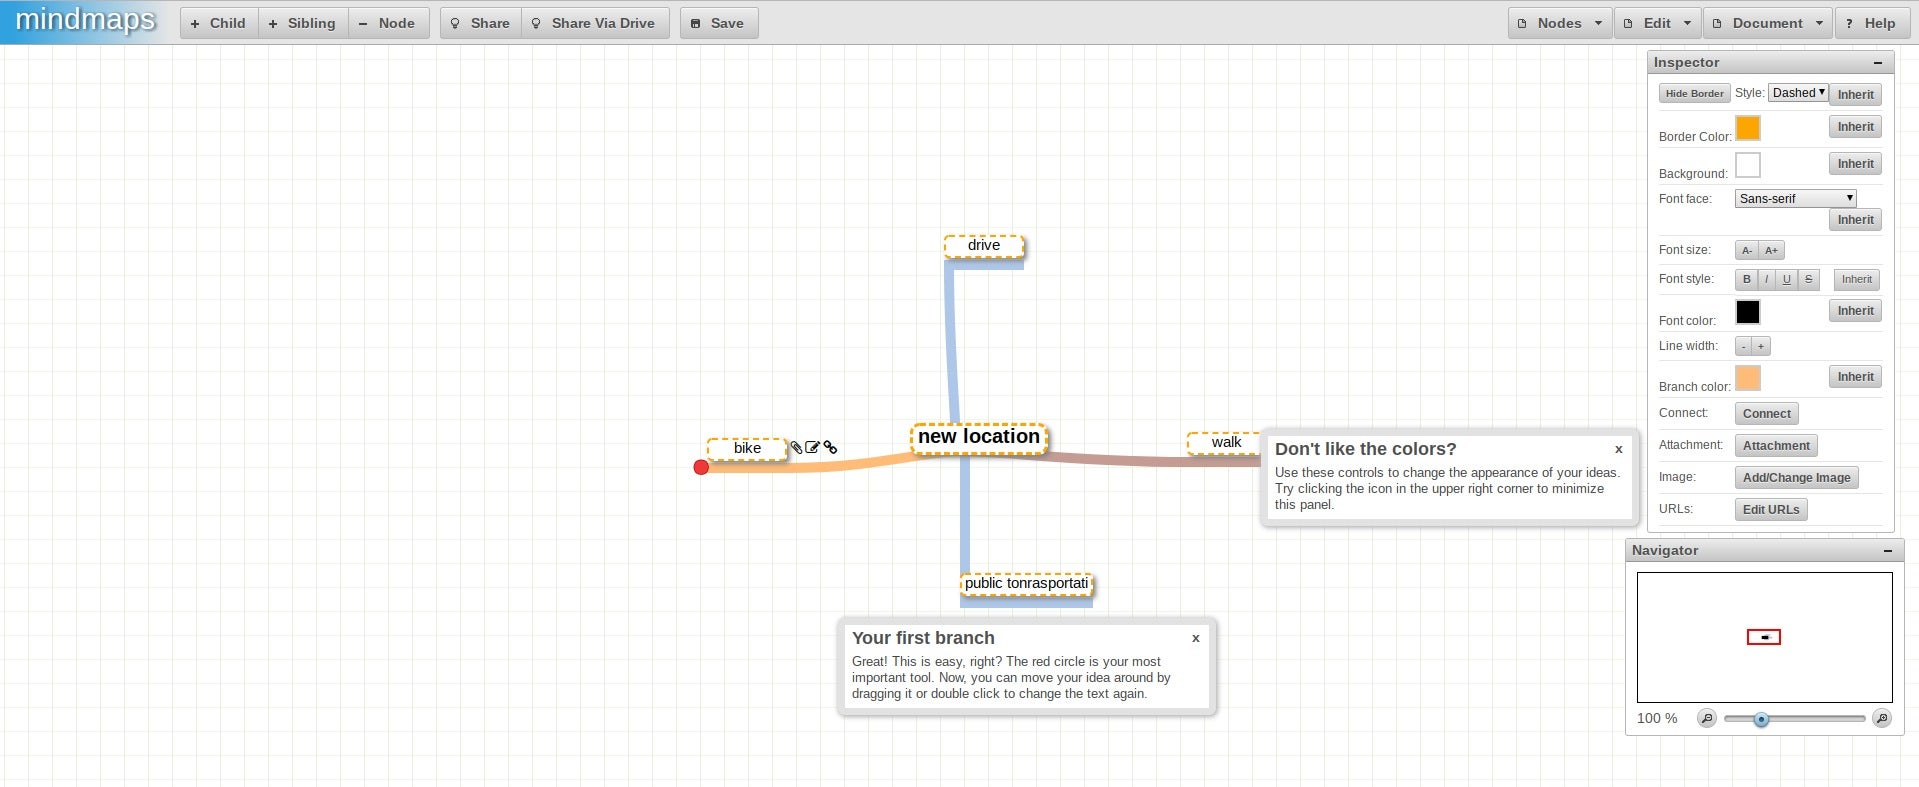
I used the system to nose around the web, read and reply to hundreds of emails, watch videos and listen to podcasts. I used Chrome apps, such as Mind Map, and saved some images on my Dropbox storage account. The best part was opening and working on collaborative files in Google Docs. I reviewed and reworked portions of a technical report and marked up a spreadsheet.
 Brian Nadel/IDG
Chrome apps such as Mind Map naturally work well on the retrofitted Chromebook. (Click image to enlarge.)
Step 7: Checking out Chrome
A big bonus is that every part of the Radius system worked without any intervention. It connected to my company’s Wi-Fi infrastructure, its Bluetooth radio worked with a Logitech Mini Boombox and the system’s touchscreen, keyboard and touchpad responded perfectly.
 Brian Nadel/IDG
Bluetooth setup in Chrome. (Click image to enlarge.)
While it’s close, a CloudReady system isn’t exactly a full Chromebook. To start, Android apps won’t load on the CloudReady system, and there’s no vocal searching, logging in as a supervisor or translating highlighted items. Of more concern, IT pros can’t use PowerWash to remove user data, but you can just run the flash drive’s software to start over for a new user. Other than that, it acts like a Chromebook.
Step 8: Discovering extras
The center of attention may be the Chrome interface, but the Enterprise Edition’s dashboard page is the focal point for IT folks. Logically laid out, front and center you can track licenses along with their expiration date. Along the left is a powerful set of detail sections that make it easy to focus on specific items, such as Plugins for Flash and other activities, and a list of users with their login names. On the other hand, the design is simplistic and ignores opportunities for synergy, such as streamlining the process by putting together the device and user data with the license information.
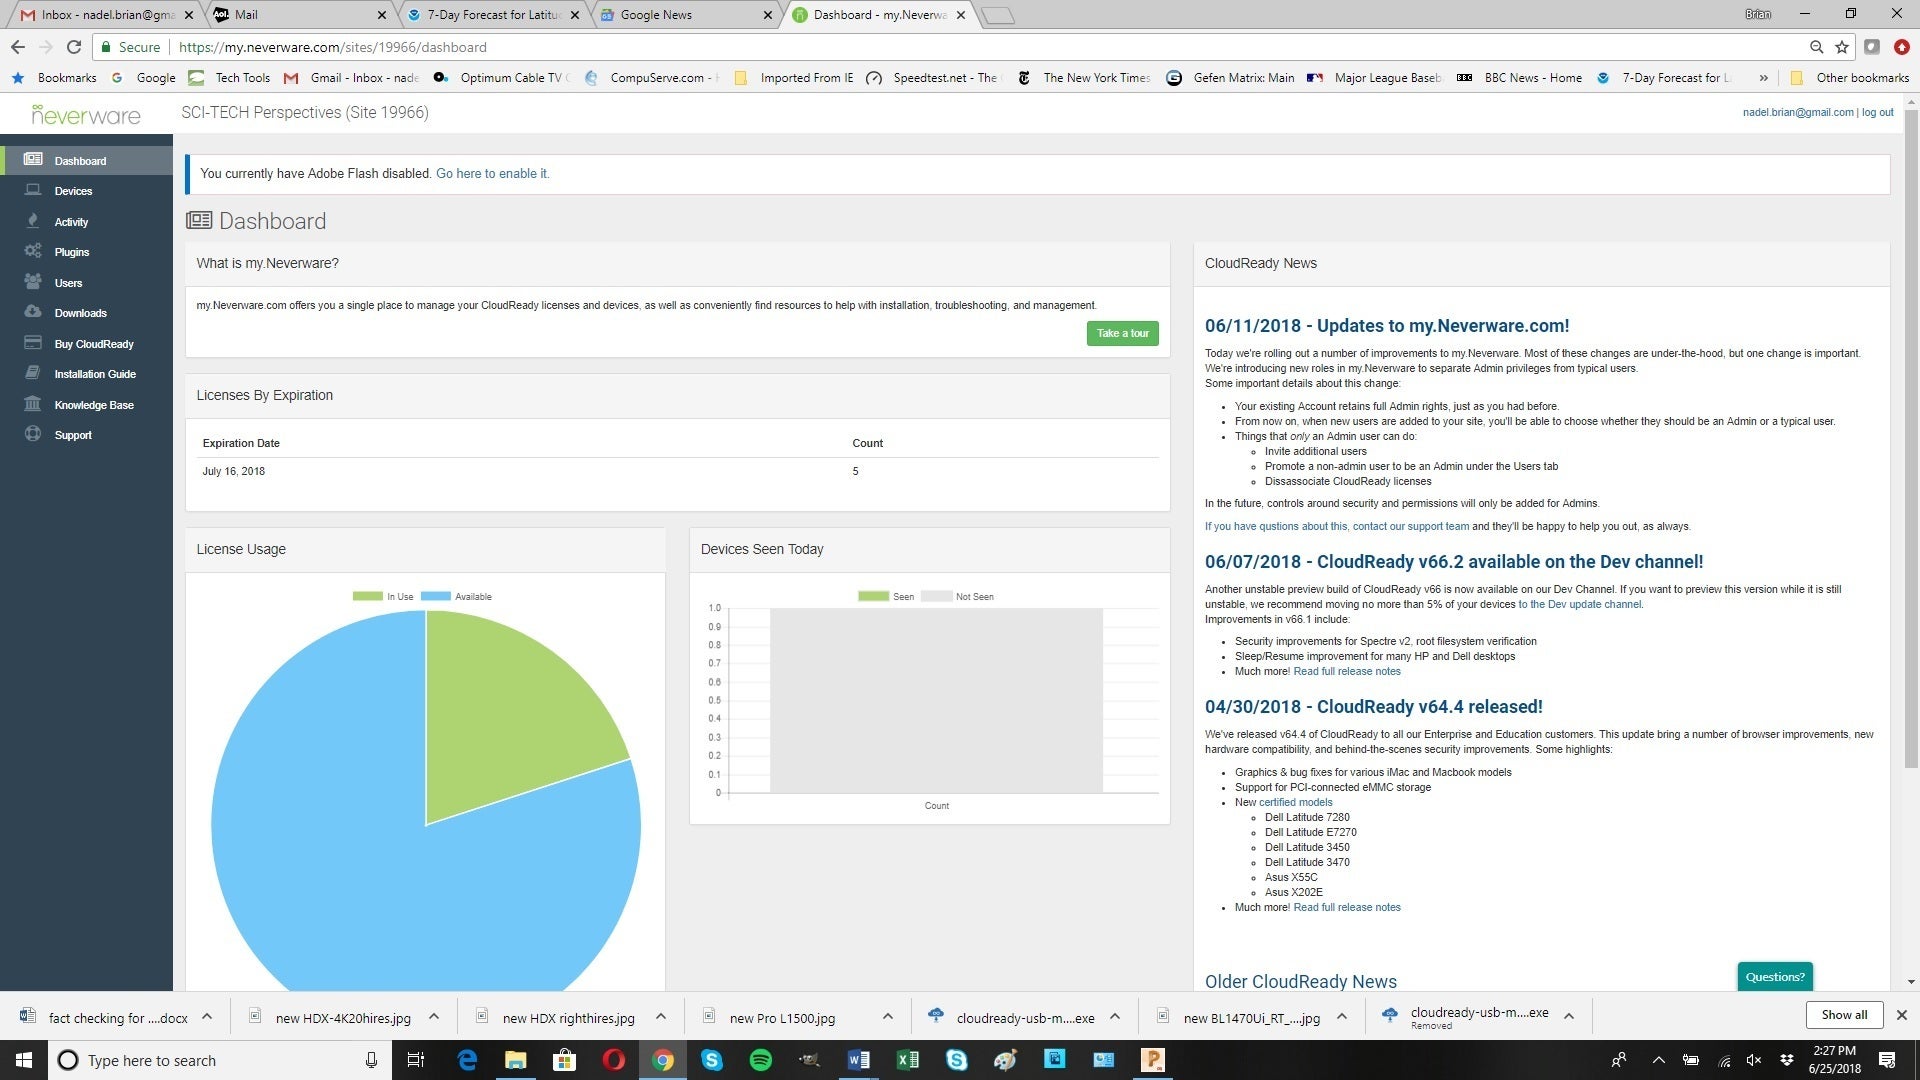 Brian Nadel/IDG
The Neverware dashboard is available with the Enterprise Edition. (Click image to enlarge.)
While you can get and use the software for free, companies that pay the $49 a year to license the software get a lot more support, including access to Neverware’s online help resources that include a Forum and a Knowledge Base with lots of problems and solutions. There's also the current three most popular tips that might help avoid or get out of trouble. Technicians are available for phone help from 8:30 a.m. to 5:30 p.m. (Eastern time), Mondays through Fridays, or via email.
All in all, the CloudReady software is as close to corporate recycling as it gets these days. It can turn junk and castoffs that are collecting dust into powerful tools that your company can use every day.
Read this next: 40 Chromebook tips for maximum productivity